知ってました?iOS9で写真アプリに入っている写真を非表示にする方法

この記事を書いたおかげで、□に↑が共有メニューという名前であることを初めて知りました。
写真は、プライベートなものがてんこ盛り。
ということで、iOS9でその写真を非表示にすることができますのでご紹介します。
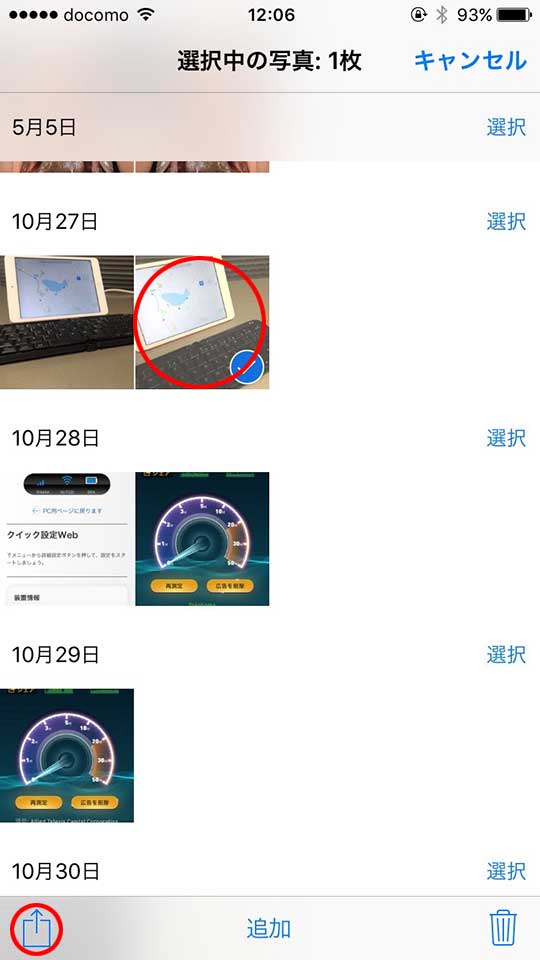
写真アプリをタップして、非表示にしたい写真を選択します。その後、画面左下、共有メニューをタップします。
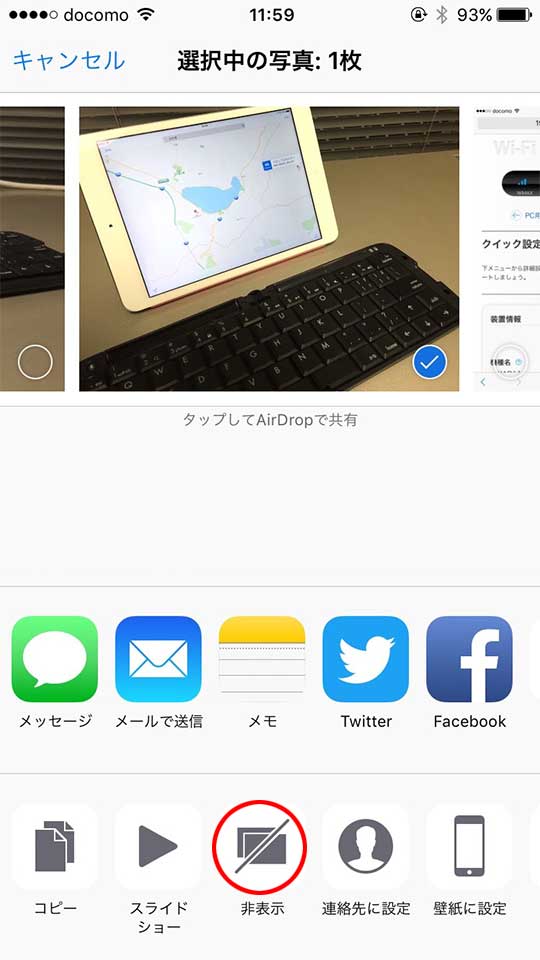
「非表示」が出てきますので、そちらをタップします。
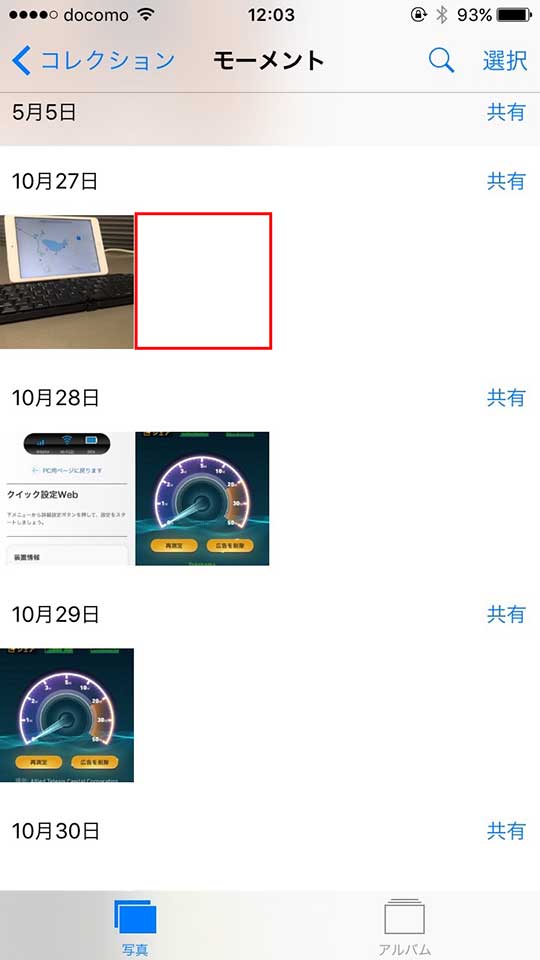
非表示を選択した写真が消えます。
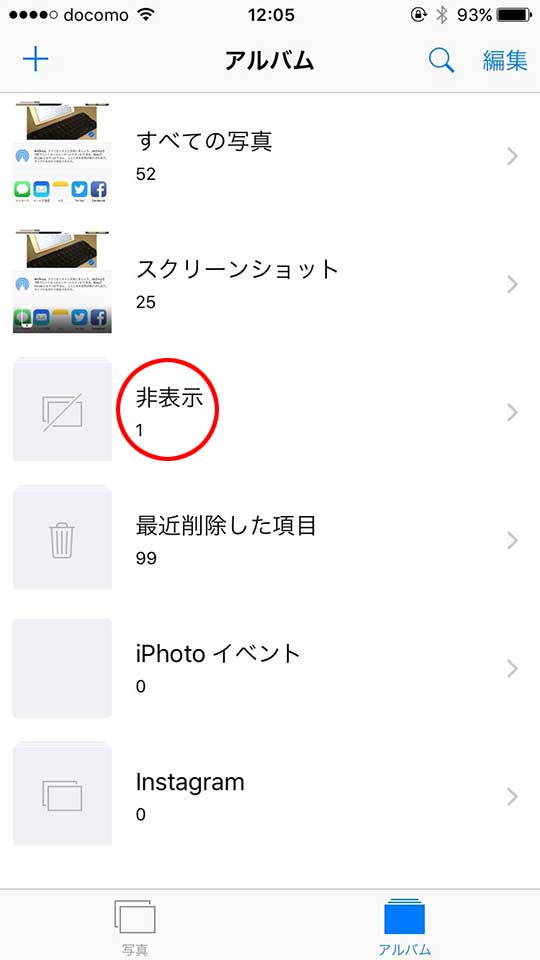
常に表示したい(元に戻す)場合は、同じように非表示のメニューをタップします。
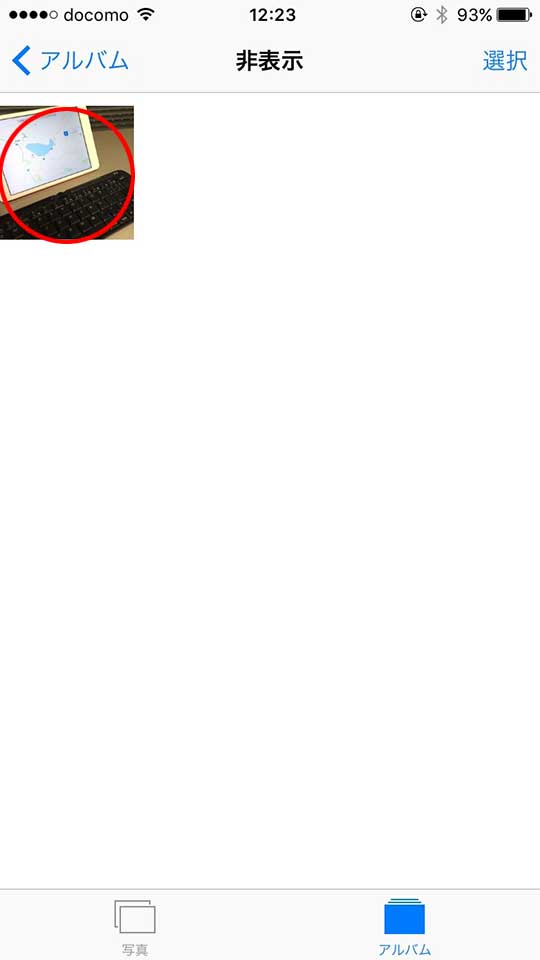
元に戻したい写真をタップします。
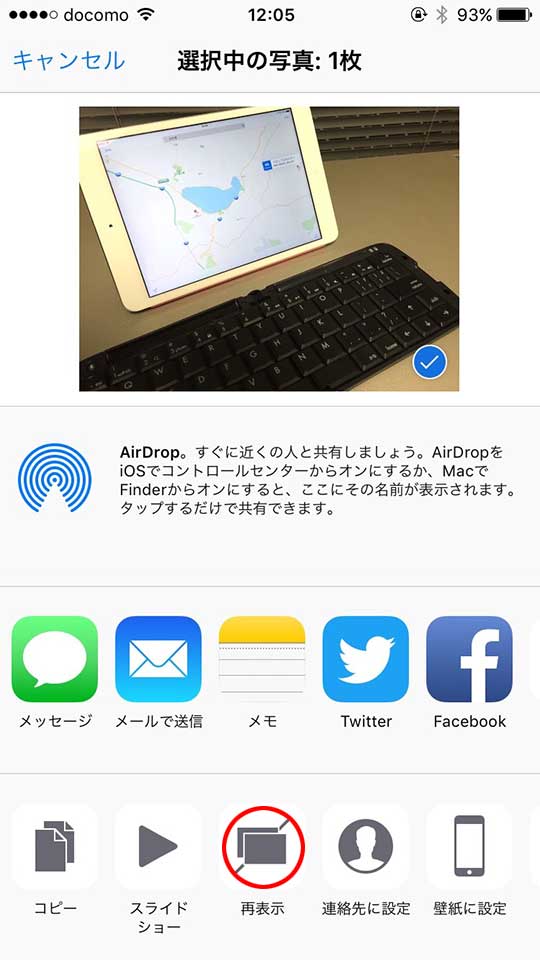
「再表示」をタップします。